
Before you can add a template to isave.DIALOG you must have made a template (.zip) ready in Pageflex Studio.
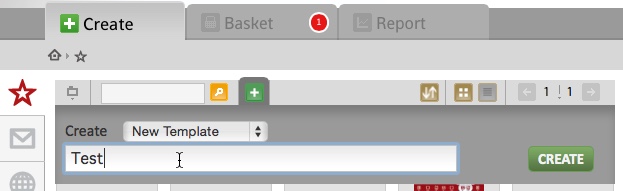
1. Click the plus button.
2. Select “new template” in the drop-down menu.
3. Enter the name of the template.
4. Click ”create”.
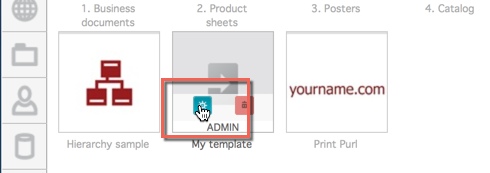
5. You will now enter directly into the new template. Later, you can always click on the admin button to change the template.
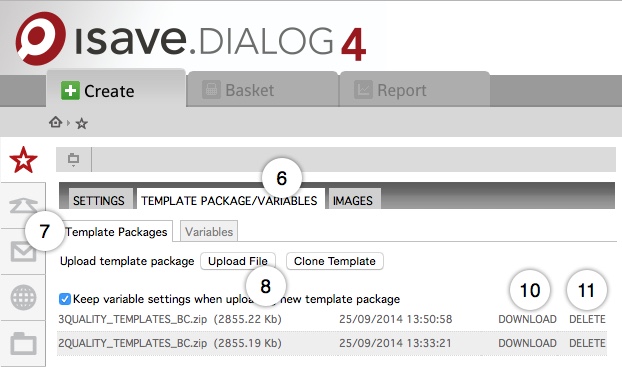
6. Click on the tab ”template package/variables”.
7. Then click on the tab ”template packages”.
8. Choose to ”upload file”.
9. Select the zip file that you have created in Pageflex Studio and click “open”. When the zip file is uploaded it will be marked with the date and time for the upload.
10. You can download the template packages from isave.DIALOG by clicking on the button “download”.
11. You can delete old templates by clicking the “delete” button.
Isave AS takes care of up to 4 template packages in it’s archive. When the archive is full, you will be instructed to delete an old template in order to upload a new one.
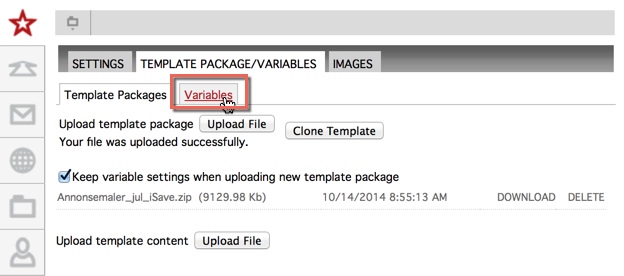
Setting up variables
1. Click on the tab ”variables”.
2. You can change the order of the variables by clicking the arrow icon and drag the variable to where you want it. The blue bar under the variable name indicates the variable will be placed when you release it.
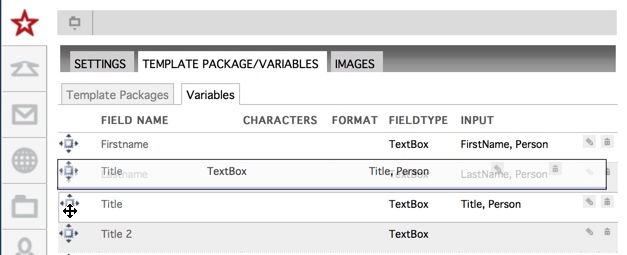
3. Click on a variable to edit it, or click the edit icon.
4. To save changes, click “save”.
5. Edit the variables in the template:
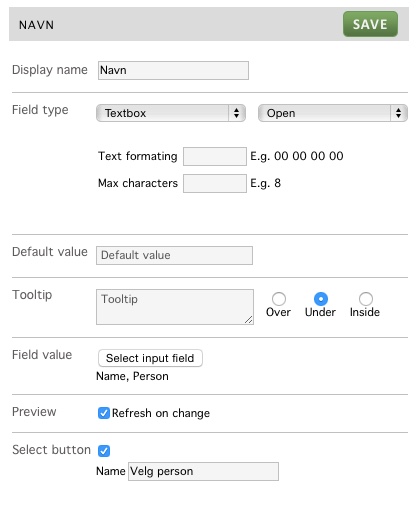
Display name: The fields name displayed to the user who creates a document.
Field type: This is a drop down menu where you can choose what kind of field you want to use. Text box, text field, dropdown, image, checkbox, radio buttons etc.
Set the variable type to “Image Upload” if you want users to be able to upload pictures from their machines, and not only get images from the files-folder.
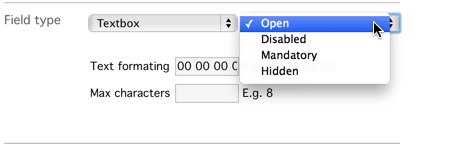
The next drop down menu is used to select if the field should be disabled (visible to user, but can not be changed), mandatory (required) or hidden (concealed, only admin has the ability to change this, end user will not see it). If the variable is set to Mandatory and are not filled in by the user, a red text with the variable name and the words “is a required field” will show, and the process of generating PDF files stops until the user has entered a value in the field.
Text Formating: To format a phone number in a special way you can use either 0 or # with spaces. Note that this feature only works when your number comes as a string (no spaces) in the document. If users add spaces when making the document the user’s formatting override the systems formatting.
Max characters: To enforce a given formatting it is possible to put a character limit on the variable field so that the phone number must be entered as a string and then benefit from the system’s formatting.

Default value: Here you can add a default text for the text field.
If you do not want the user to be able to change this value (eg. a web address), you can set the variable to hidden under “field type”. Then only an administrator can change the value of this variable, and it will not appear for an end user.
Tooltip: Insert help text for the end user.
Field value: The variables can be linked to various database values by selecting “Select input fields”.
Preview: Check “Refresh on change” if you want the preview to update itself after a change in this field.
Select button: Click “select button” if this is a field where the end user should be able to choose f. Ex department. Enter a name for the button. This appears automatically when you check this checkbox.
Do you experience difficulties adding a print template to isave.DIALOG, please contact us in Isave AS, so we can help!
Related links:
Specifications for print templates
Prices
Variants
Related products
Availability
Add a supplier to print documents
Order print documents


Leave A Comment?