
The great advantage of landing pages in isave.DIALOG is that you can embed forms that users can fill out. This can be used to gather more information about customers so you can send more relevant newsletters or it can be used as order forms etc. There are many possibilities.
How to insert a form
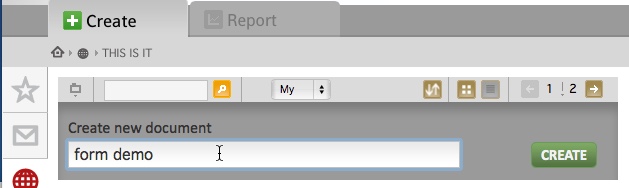
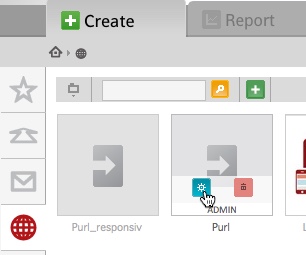
1. Start by accessing isave.PURL.
2. Click on the right template.
3. Create a new document by typing the name and click ”Create”.
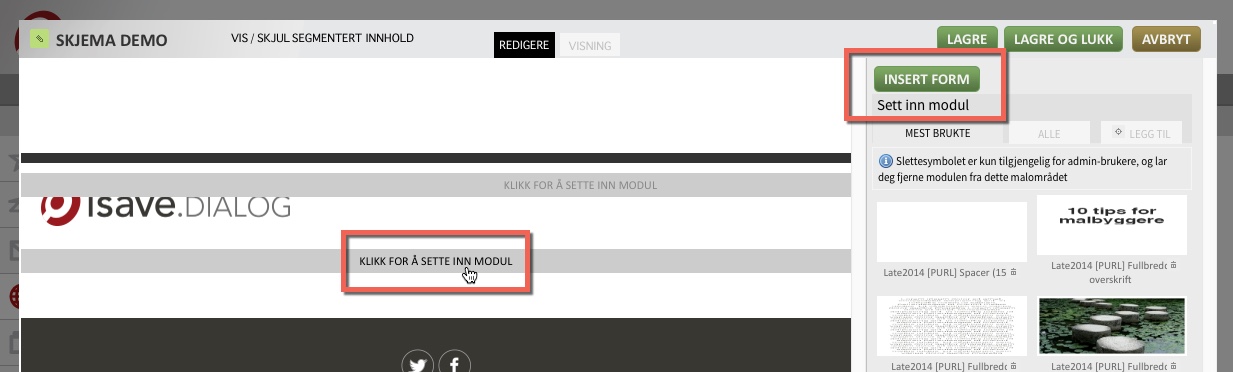
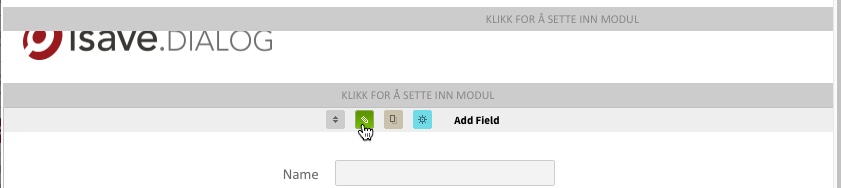
4. Click to insert a new module.
5. Then, click on the green button ”Insert form”.
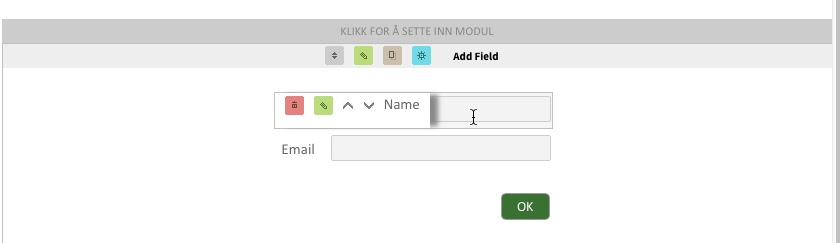
6. “Name” and “email” fields will come opp automatically. These can be changed by hovering over the field. It will then appear a possibility to edit or delete. You can also use the arrows to move a field up or down in relation to the other fields in the form.
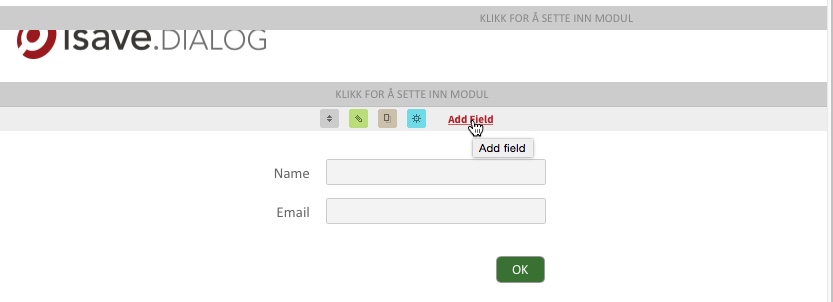
7. Click on the edit icon to edit the name, enter help text or insert default value. You can also choose whether the field should be required for the user to enter (mandatory) or be disabled.

8. To add more fields press “add field”. There will come up five default fields (firstname, lastname, name, email and mobile). In addition, you can add fields yourself under system – specifications – Database ”contacts”. Read how to add specification fields.
9. To the left of “add field” there is two icons, one to export the form and the blue one to import a form. These buttons are used if you want to code the form outside isave.DIALOG.

10. Click on the green edit icon to bring up the editing possibilities of this form.
11. The editing will look like this:
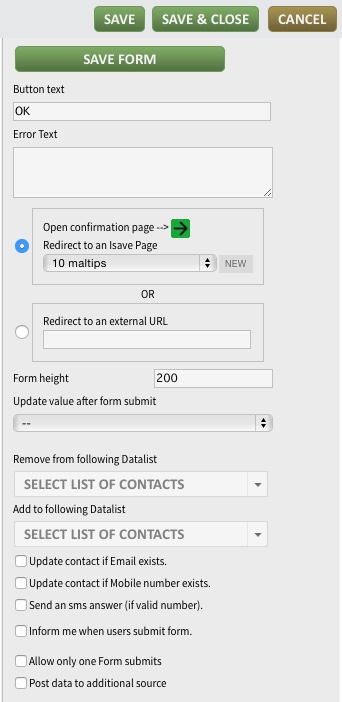
Here is an explanation of the different fields:
Save form: Click to save changes to the form.
Button text: Enter what should be written on the button.
Error text: Enter a small text that pops up if something happens wrong. Eg making sure all required fields are filled.
Redirect: Choose to send the user to a external site or another isave.DIALOG site when they have answered the form. If you choose to send them to another Isave page, you can select an existing page from the dropdown menu or create a new page from scratch.
Form height: Insert the height of the form. This can be difficult to know, but if you have inserted all fields will be able to see approximately how long it needs to be.
Update value after form submit: Here you can select a field to be updated after a user has filled out the form.
Remove from following datalist: Select a list if the respondents shall be deleted from the list they are on. Use this in conjunction with the field below when contacts are moved from one list to another.
Add to following datalist: Select a list here if the respondents shall be added to a new list.
Update contact if Email exists: Check here if the contact shall be updated if it already exist a contact with the same email address.
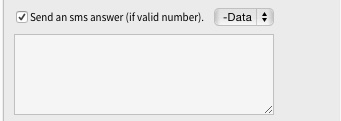
Send an sms answear (if valid number): Check this to send a sms answer to those who submit the form.
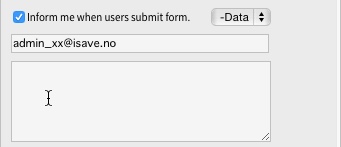
Inform me when users submit form: Check this to inform yourself when people submit the form.
Allow only one Form submit: Check this if a user should only be possible to submit the form once.
Formatting forms in PURL (Coding)
1. Start by accessing isave.PURL.
2. Click into the admin-button on the template.
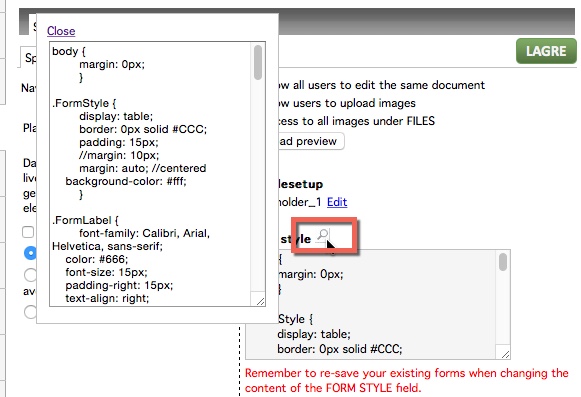
3. Under the ”settings”-tab there is a field called ”Form style”. Here you can paste the CSS for the form.

4. Start by clicking on the “magnifying glass”-icon to bring up a general finished code. Copy it and paste it into the box “form style” to have a good starting point for the styling of the form. All the classes are added so it is easy to edit colors, fonts etc. It is a advantage to know CSS coding.
Do you experience problems with forms PURL, please contact us in Isave AS, so we can help!
Related links:
How to make a PURL
How to add specification fields
Make good landing pages


Leave A Comment?