
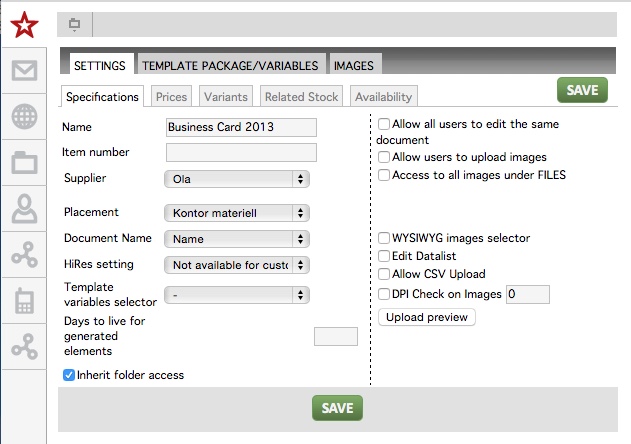
When you add a print template to isave.DIALOG, you get several tabs where you can enter settings for the template. One of these is called “settings”, and under this tab there are again several tabs you can choose from. Here is an explanation of the settings under “Specifications”:
Name: Give your template a name.
Item number: Here you can enter a unique reference number for the product.
Supplier: Here you can select supplier for your orders. Read how to add suppliers.
Placement: Here you can change the placement of your template.
Document name: Default value is “manual”, which means that users name their templates themselves. But this can also be added to such as name. Stock, for example a business card and this is set to name all documents created be named as the document name as well.
HiRes setting: Choose if the end user should be able to see HiRes-files.
1. Not available for customer: Default value that hides the HiRes-file
2. Always available: Always displays the HiRes-file
3. Always in orderdetails: Showes the hiRes-file in the order page.
Template variables selector: Used to filter which variables that should be available to the end user, based on the values of a “drop down”-variable.
Example:
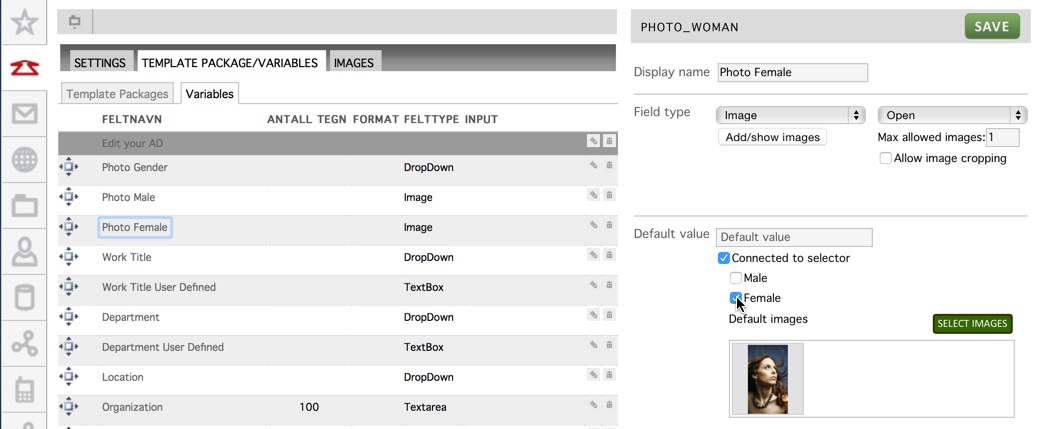
1. In a template, it is created a variable with a dropdown list, in this case “Photo Gender”.
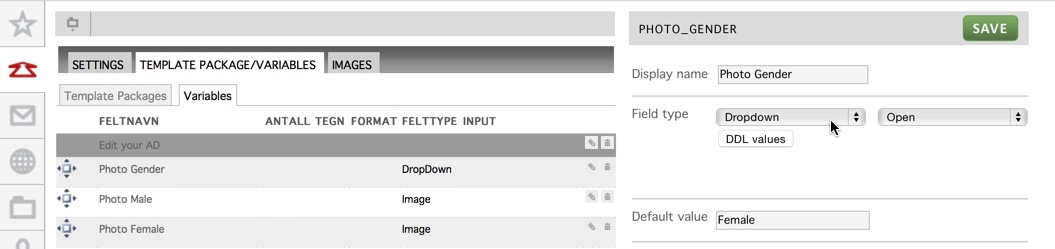
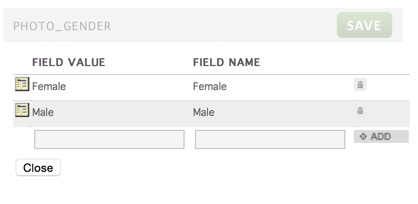
2. In the dropdown list in this example it is two values, male and female.
3. Under “Template variables selector” choose the variable for the dropdown-list.
![]()
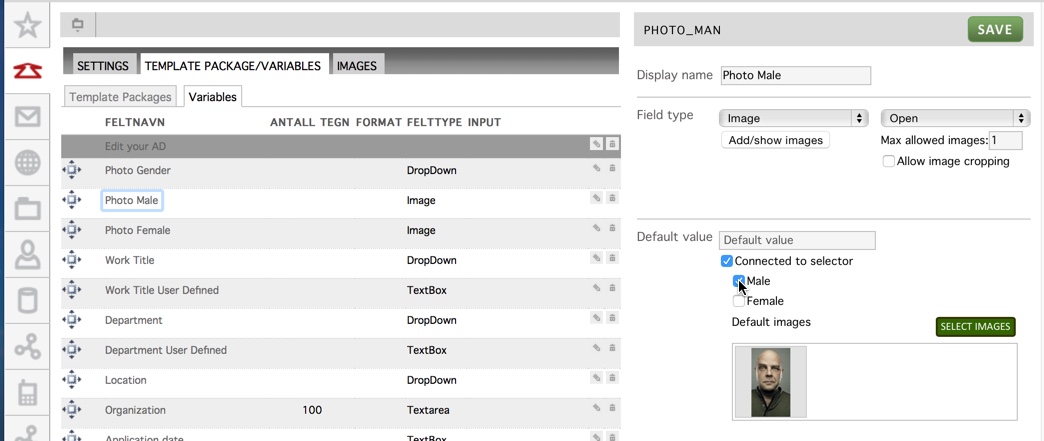
4. Finally you go into the different variables to associate with the dropdown list. Check “connected to selector” and which of the values in the dropdown list this variable applies. You can also add a default image.
Days to live for generated elements: If you want the generated documents to be deleted after a certain time, set this here.
Inherit folder access: If this is not checked you get three choices.
1. Available to all: Anyone can see this template.
2. Available for selected department / user group: Only users who are members of a particular group / department may see this template. Selecting group / department comes up when checking this option.
3. Available only for admin: Only admins can see this template.
Allow users to edit the same document: If you want the users to be able to edit the same documents, check this.
Allow users to upload images: If you want users to be able to upload their own images, and not only use images from files folder, check this.
Access to all images under FILES: Check this if you want the end user to have access to all folders under the Files folder. Otherwise, you can control this on the tab images.
Format Width/height: Enter the measured height and width.
WYSIWYG images selector: Allows user to select images from save.FILES to create PDF file by WYSIWYG format.
Edit datalist: By checking this you allow that the document can be linked to a datalist in the contact module. Used when making personal print documents.
Allow CSV Upload: By checking this you allow that the document can be linked to a CSV file. Used when making personal print documents. Read more about connecting print documents to a CSV file here.
DPI Check on Images: Here you can add a DPI check for images, resolution on images. If you want to make sure that all images are for example 300 dpi, you can enter this here so that the program always tell you if this is incorrect.
Upload preview: Upload a preview for the end user. This will appear on the small icon for the template.
The template to the left has uploaded a preview, while the template to the right does not.
Do you experience problems with the specifications of the print templates, contact us Isave AS, so we can help!
Related links:
Add suppliers
Availability for images in print templates
Add a print template


Leave A Comment?