Under system – users in isave.DIALOG you can create users for your page.
Users can be creates manually or by importing an excel-file.
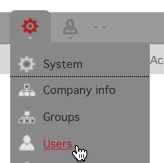
1. Click on the system icon.
2. Click on “users”.
Note! Only administrators of isave.DIALOG have access to users.
Icon-explanations
Grey: Regular user with some limited rights and permissions. Have access to the system, and can produce documents, book and manage their own personal info.
Black: Administrator with all rights and permissions. Admin can manage the site with groups, users and content.
White: User is inactive. There is no specific username yet, but data stored on your user can be used in templates.
If you want to edit a user in the system, hoover over the name and click.
How to add a user manually
1. Press the green plus icon.
2. Press Create.
Standard Fields for users
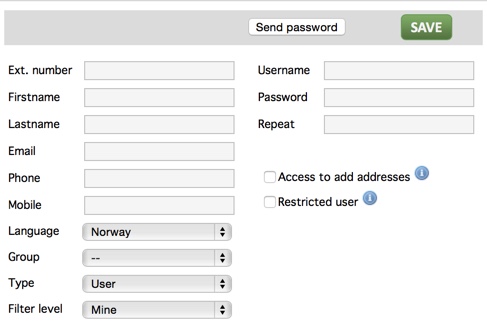
Here comes an explanation of each of the default fields for a user:
Ext. Number: Used to record such a dedicated customer number from a CRM system or other customer management systems.
Firstname: Users first name.
Lastname: Users last name.
Email: Users email address.
Phone: Users phone number.
Mobile: Users mobile phone number.
Language: Select from the drop down menu what language the user wants in isave.DIALOG.
Group: Choose which department the user belongs to. If templates and folders access is controlled by groups, this user can access the templates and folders belonging to the group selected here.
Type: Choose whether this person should be a regular user or administrator.
Filter level: Select whether the user will have access to only their own documents, a group’s documents or all documents.
Passord: Admin must enter a user name and password the first time the user is registered. This must be unique. “Send password” will send an email to the user with the URL and information about logging into isave.DIALOG. The user can later change this under system and “my profile”. Read more about my profile.
Access to add addresses: This can be checked if the user should be allowed to enter addresses in the basket. Users that have this checked, also see the address that is locked to a group.
Restricted user: User will only see folders and folder contents that specifically belongs to a user group he / she belongs to. He / she can not open folders without access. This will not work for administrators.
Add your own fields for users
Under system – specifications you can go to “person” and add your own specification fields for users. These will then appear below the standard fields for the user. Read more about how to add specification fields.
Add users with an csv-file
1. Go into the system menu and users.
2. Press the “download example file” to download a template. It is important that all custom fields are made before downloading this otherwise they will not follow in the template.
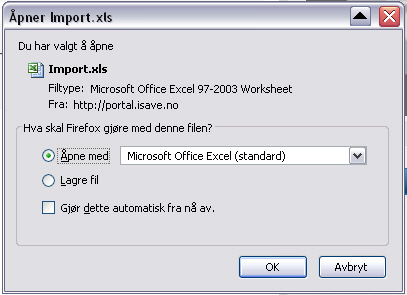
3. Open the file in Excel.
4. Enter data in the document and save as CSV (ANSI format).
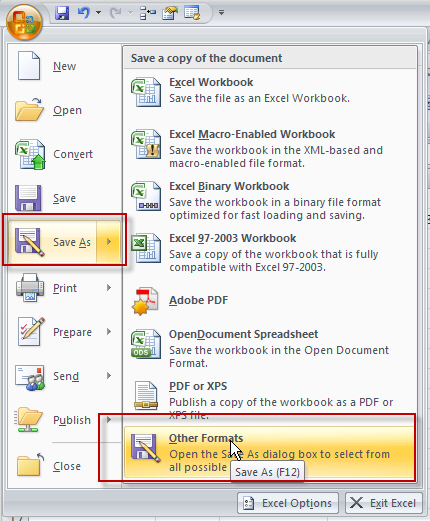
5. Choose ”save as” – other formats.
6. Select a file name and select CSV (Comma delimited) (*. Csv) and press “save”.
7. If you have a backup of your excel file, select yes to change the format. Save always a excel-document format first.
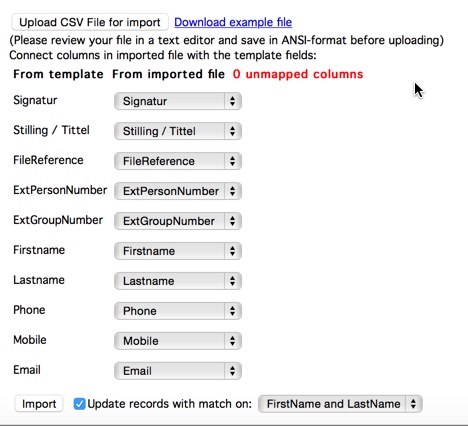
8. Upload the CSV file in isave.DIALOG by clicking on “upload CSV file for import.”
9. If you have not edited the header names, all fields should automatically connect to the appropriate field in isave.DIALOG.
10. If this is an update, check the “update records with match on” and select what is to be matched. This avoids duplicates.
If you need help with the setup of users, please contact us in Isave AS, so we can help!
Related links:
My profile
Specifications
Groups








Leave A Comment?