
Under system settings and groups in isave.DIALOG, you can create groups of the firm. Groups can be used for access control and / or to post information that can be retrieved automatically to printed matter etc.
Groups can be entered manually or by import of excel file.
1. Click on the system icon.
2. Click into “Groups”.
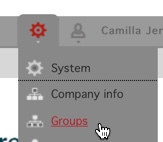
Note Only administrators of isave.DIALOG have access to Groups.
How to add a department manually
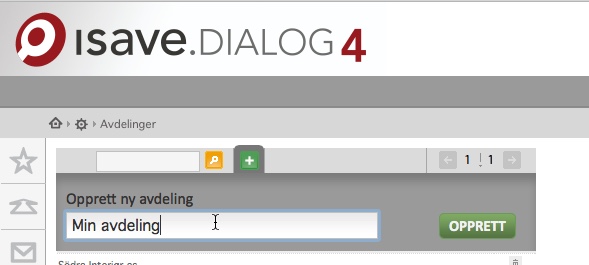
1. Press the green plus icon.
2. Enter the name of the group.
3. Press Create.
On the right side it appears some fields where you can enter information about the group. Fill in the required information.
Standardfelter for avdeling
The fields on the left are standard fields, while fields to the right are fields you create yourselves. Read more about creating fields this later in this article. Here is an explanation of each of the default fields for a group:
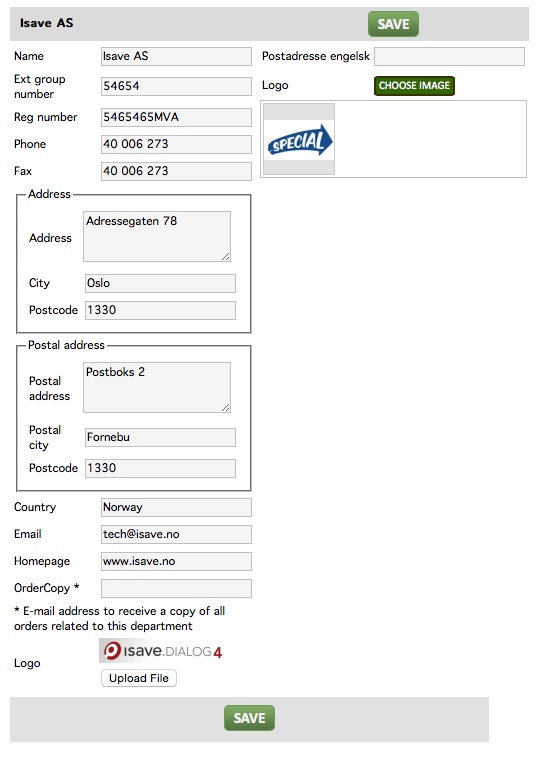
Name: The name of the group. The value can later be used in templates through the database specifications – Group and using variable (##GROUP_GROUPNAME##).
ExtGroupNumber: Used to record a dedicated customer number from a CRM system or other customer management systems.
Reg number: For example, VAT registration number.
Phone: The groups phone number. The value can later be used in templates through the database specifications – Group and using variable (##GROUP_PHONE##).
Fax: The groups fax number. The value can later be used in templates through the database specifications – Group and using variable (##GROUP_FAX##).
Address: The groups address. The value can later be used in templates through the database specifications – Group and using variable (##GROUP_ADDRESS##).
City: The groups city. The value can later be used in templates through the database specifications – Group and using variable (##GROUP_CITY##).
Postcode: The groups zip code. The value can later be used in templates through the database specifications – Group and using variable (##GROUP_ZIP##).
Postal address: The groups mailbox address. The value can later be used in templates through the database specifications – Group and using variable (##GROUP_POSTALADDRESS##).
Postal city: The groups mailbox location. The value can later be used in templates through the database specifications – Group and using variable (##GROUP_POSTALCITY##).
Post code: The department’s mailbox code. The value can later be used in templates through the database specifications – Group and using variable (##GROUP_POSTALZIP##).
Email: The groups email address. The value can later be used in templates through the database specifications – Group and using variable (##GROUP_EMAIL##).
Ordercopy: Used to record one or more e-mail addresses. For example (post@domain.com; epost2@doamin.com). A copy of all orders will be sent to the email addresses registered in this field.
Homepage: The groups website. The value can later be used in templates through the database specifications – Group and using variable (##group_homepage##).
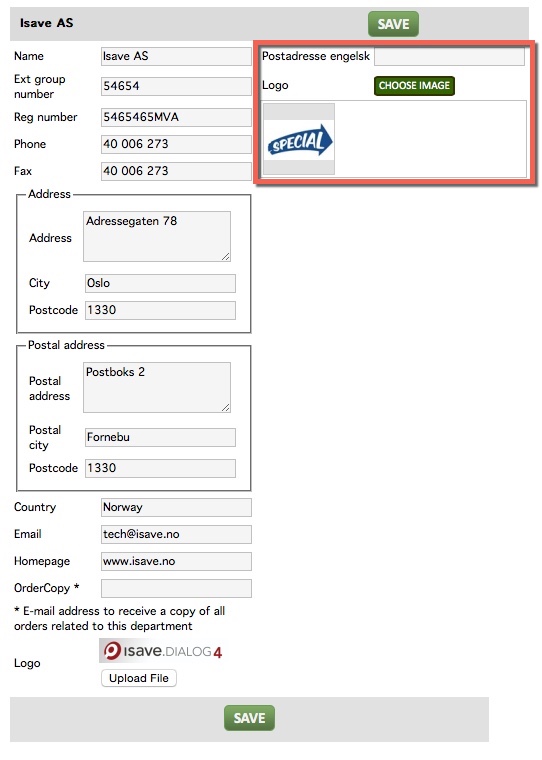
Create your own fields for groups
Under system – specifications and “group” you can add your own specs fields for the group. These will then appear on the right side. Read more about creating specification fields.
Add groups with csv-file
1. Go to system and groups.
2. Push the ”download example file” to download a template. It is important that all custom fields are made before downloading this otherwise they will not follow the template.

3. Open the file in Excel
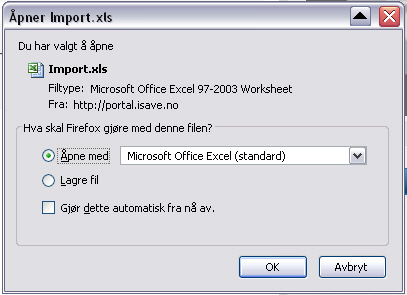
4. Enter data in the document and save as CSV (ANSI format).

5. Choose ”save as” – other formats.
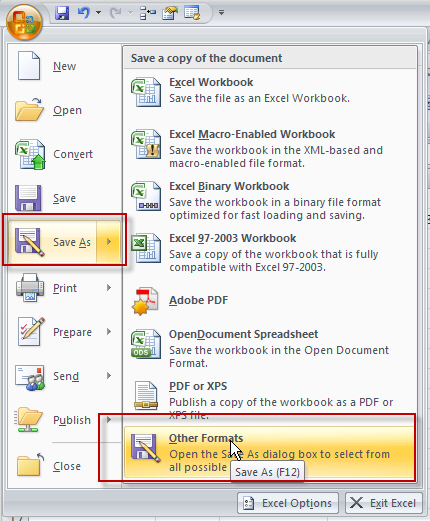
6. Choose a filename and select CSV (Comma delimited) (*. Csv) and press “save”.

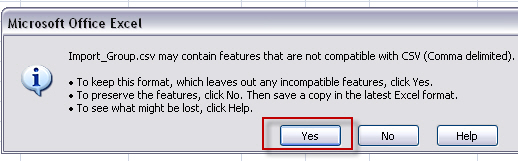
7. If you have a backup up of your excel file, select yes to change the format. Save always a excel-document first.
8. Upload the CSV file to isave.DIALOG by clicking on “upload CSV file for import.”

9. If you have not edited the header names, all the fields should connect automatically to the appropriate field in isave.DIALOG.
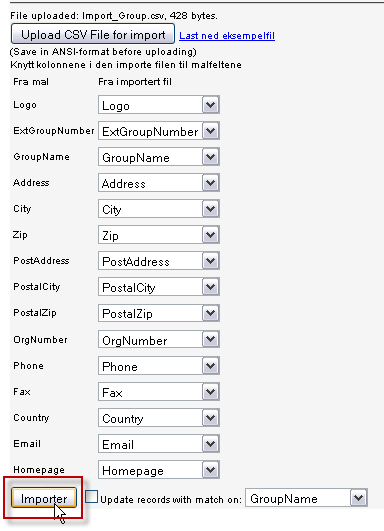
10. If this CSV-file is an update, check off the “update records with match on” and select what is to be matched. This avoids duplicates.

If you need help setting up groups, please contact us in Isave AS, so that we can help you!
Related links:
Specifications – Groups and Company
Users
Specifications


Leave A Comment?